Thursday, June 29, 2017

Au revoir...& thank you

Today is my turn up on the Couture Creations blog and I started off making a card for the blog post. As luck would have it the darn thing would NOT cooperate and did not take shape as I wanted it to.  I was pretty annoyed as this is my last ever blog post for the DT.

So I thought to myself, hey lets pull out some of my golden oldies and put them up as a showcase of some of the beautiful products from Artdeco Creations I have had the privilege of working with over the years.

WELL..wasn't I in for a shock..I got all glassy eyed as I remembered all the fun times I have had with my fellow DT members over the years.

Below I will pop up some of the projects I have done over my few times on the DT but before I do I have something I need to say as my last hoorah. (LOL this may be deleted but I hope not).

People, the world can be a harsh place. We all have different circumstances, we are all different people. Some people have emotional struggles, some have medical or financial struggles, some have struggles even their best friends know nothing about. BUT through it all we all enjoy our craft so lets keep this one area of our lives pure and precious and kind. 

Do not judge your fellow crafter, do not speak harshly of each other, do not gossip. Just be kind and be a good person. 
Also support your stores..for some of us craft is our only social outlet, a break from whatever nastes life sometimes throw our way so we need our stores to be there for us..darn it they are our therapy sometimes LOL. Ok getting off my tomato box now.

Thank you to all my fellow DT members over the years, I have enjoyed getting to know you all. 
To the past & current coordinators, thanks for your patience when my DT posts have been late. 
To the people at Artdeco Creations thank you for all the confidence in my work and for all the yummy goodies 
BUT 
most importantly a HUGGGGGGGGGGGGGGGGGGGGGGGGGGGGGGGE thanks to each and every person who took the time to comment on my projects..sometimes those comments gave me such a boost when I needed it most. 

God bless you all and keep crafting.


Lots of love
Bridget


Sunday, June 18, 2017

A Special Layout with Gold Foil touches

Hello crafty friends and welcome to my second Couture Creations blog post for June 2017.
I have to showcase the Go Press & Foil again in this blog post just because I cannot stop using it in my craft projects.


This is not my usual step by step project but just a layout with a bit of foiling to show you how versatile the Go Press & Foil is and how you can use even the leftover scraps to brighten up some dull embellishments. The papers I used in this layout are some very old papers I found in my stash so I am sorry I could not tell you what they are called.

I chose my focus page and mounted it on a patterned 12x12 paper.


Next up I cut up a variety of matching patterned papers..there was no set sizes to these pieces just a random selection in various sizes. 


Once I had them stacked up large enough to stick out beyond the photo I used a mini stapler to keep them all together. I figured this out after I had the perfect arrangement and the pieces decided to move.


Using some of the beautiful flowers I chose to colour them up to match the colours in the patterned papers.


Once the mists have dried add some two way glue to the flowers at random places and once the glue has dried it should be tacky enough to add bits of heat set foil. 


I used the AMAZING new Go Press & Foil to add some gold foil to the chipboard title.


Other than that I just die cut some flourishes, placed some micro beads in my flower centers and glued all the pieces in place. Nothing too complicated at all. 


I hope this has inspired you to have a go with the new Go Press & Foil machine. It really is only limited by your own imagination. I love mine and would hate to create without it. Thanks for joining me today, see you again soon.


Products Used
C0725334 Go Press & Foil Machine
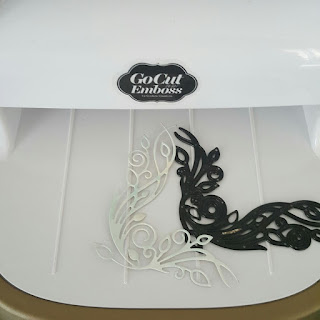
C0724824 Go Cut & Emboss machine
CO724295 Cottage Pollen Flowers
CO724288 English Flowers
CO724389 Turbo Glue Pen


Tuesday, June 6, 2017

Happy Birthday with the Go Press & Foil

Well hello there my fellow crafters and happy JUNE!!!! What the heck people, this year is zooming by.
Bridget here, up on the blog today and there is no fancy schmancy project for you this time, nor any of my ten minute quick projects..just a teeny bit of inspiration.


I recently added a Go Press & Foil to my craft tool arsenal. Yes, I know, another toy, another thing to take up space but this one, oooooh this one is going to get a workout.

I have given this incredible tool quite the workout. So what I have for you today is a few samples of how many different things you can use the hot foil stamps for. Now remember the hot foil stamps do not cut, they are just the metal based "shape" to permanently adhere foil to the paper etc.


The foil for the machine is available in over 20 different colours and effects so one hot foil stamp can look completely different depending on which foil & effect you use. Prepared to be amazed, this tool is incredible.

So here we go. Let's check out some of the materials I have foiled this one hot foil stamp too. Please note this is just a TINY sample of the things it can do.

First up I have the standard foil to paper application and I am sure you will agree this looks just stunning. If I had used textured paper the texture would show in the foil. 
Perfect, consistent results every time.


Next up we have foiled onto faux leather. I love this technique, I think it looks just beautiful.


The same hot foil stamp was then applied to vellum and I am sure you will agree this looks just lovely too. And no the vellum does not get affected by the heat of the Go Press & Foil machine.


This sample shows the hot foil stamp being used for letterpress, no foil, no heat required. The slightly spongy material in the tool allows for a brilliant impression on the letterpress paper.


Last but not least I applied a gold metallic ink to the hot foil stamp..yes you can do that and again did the letterpress technique and voila, another beautiful look.


In the card sample at the top you will see that I have hot foiled in gold some die cuts that I had done on smooth cardstock. Think how beautiful some of your delicate die cuts will look in a shimmery metallic foil.

So that wraps up my show and tell for this week.

There will be WAY more projects on the Design Team blog coming up showing a gazillion things you can do with this tool. So keep checking us out..we love it when you come & visit us and leave us some love in the comments. See ya soon. Happy foiling.

Products Used
C0725334 Go Press & Foil Machine
C0725288 Anna Griffin Happy Birthday Hotfoil stamp
C0724824 Go Cut & Emboss machine.